Drawing portrait can be very daunting if you’re doing it for the first time. Most people find portraits difficult because of the unrealistic expectations they have- you won’t magically draw perfect faces right from the start, it will take some time and practice, both of which are in your control.
The other thing that gets beginners worked up is not knowing where to start. That’s what I will be helping you with. The following steps are intended to make the process of starting portraits easier. Instead of trying to jump to a finished sketch, we focus on completing one small task at a time.
1. Choosing a subject
‘Who’ you draw is just as important as ‘How’ you draw. You could draw a family member/ a friend/ your favorite celebrity or a fictional character. Drawing someone you love can make a lot of difference. This love more often than not shows in the sketch.
Another advantage of drawing someone whose face you know is that you can tell whether or not your sketch has captured the likeness of the person.

2. Choosing a Good Reference.
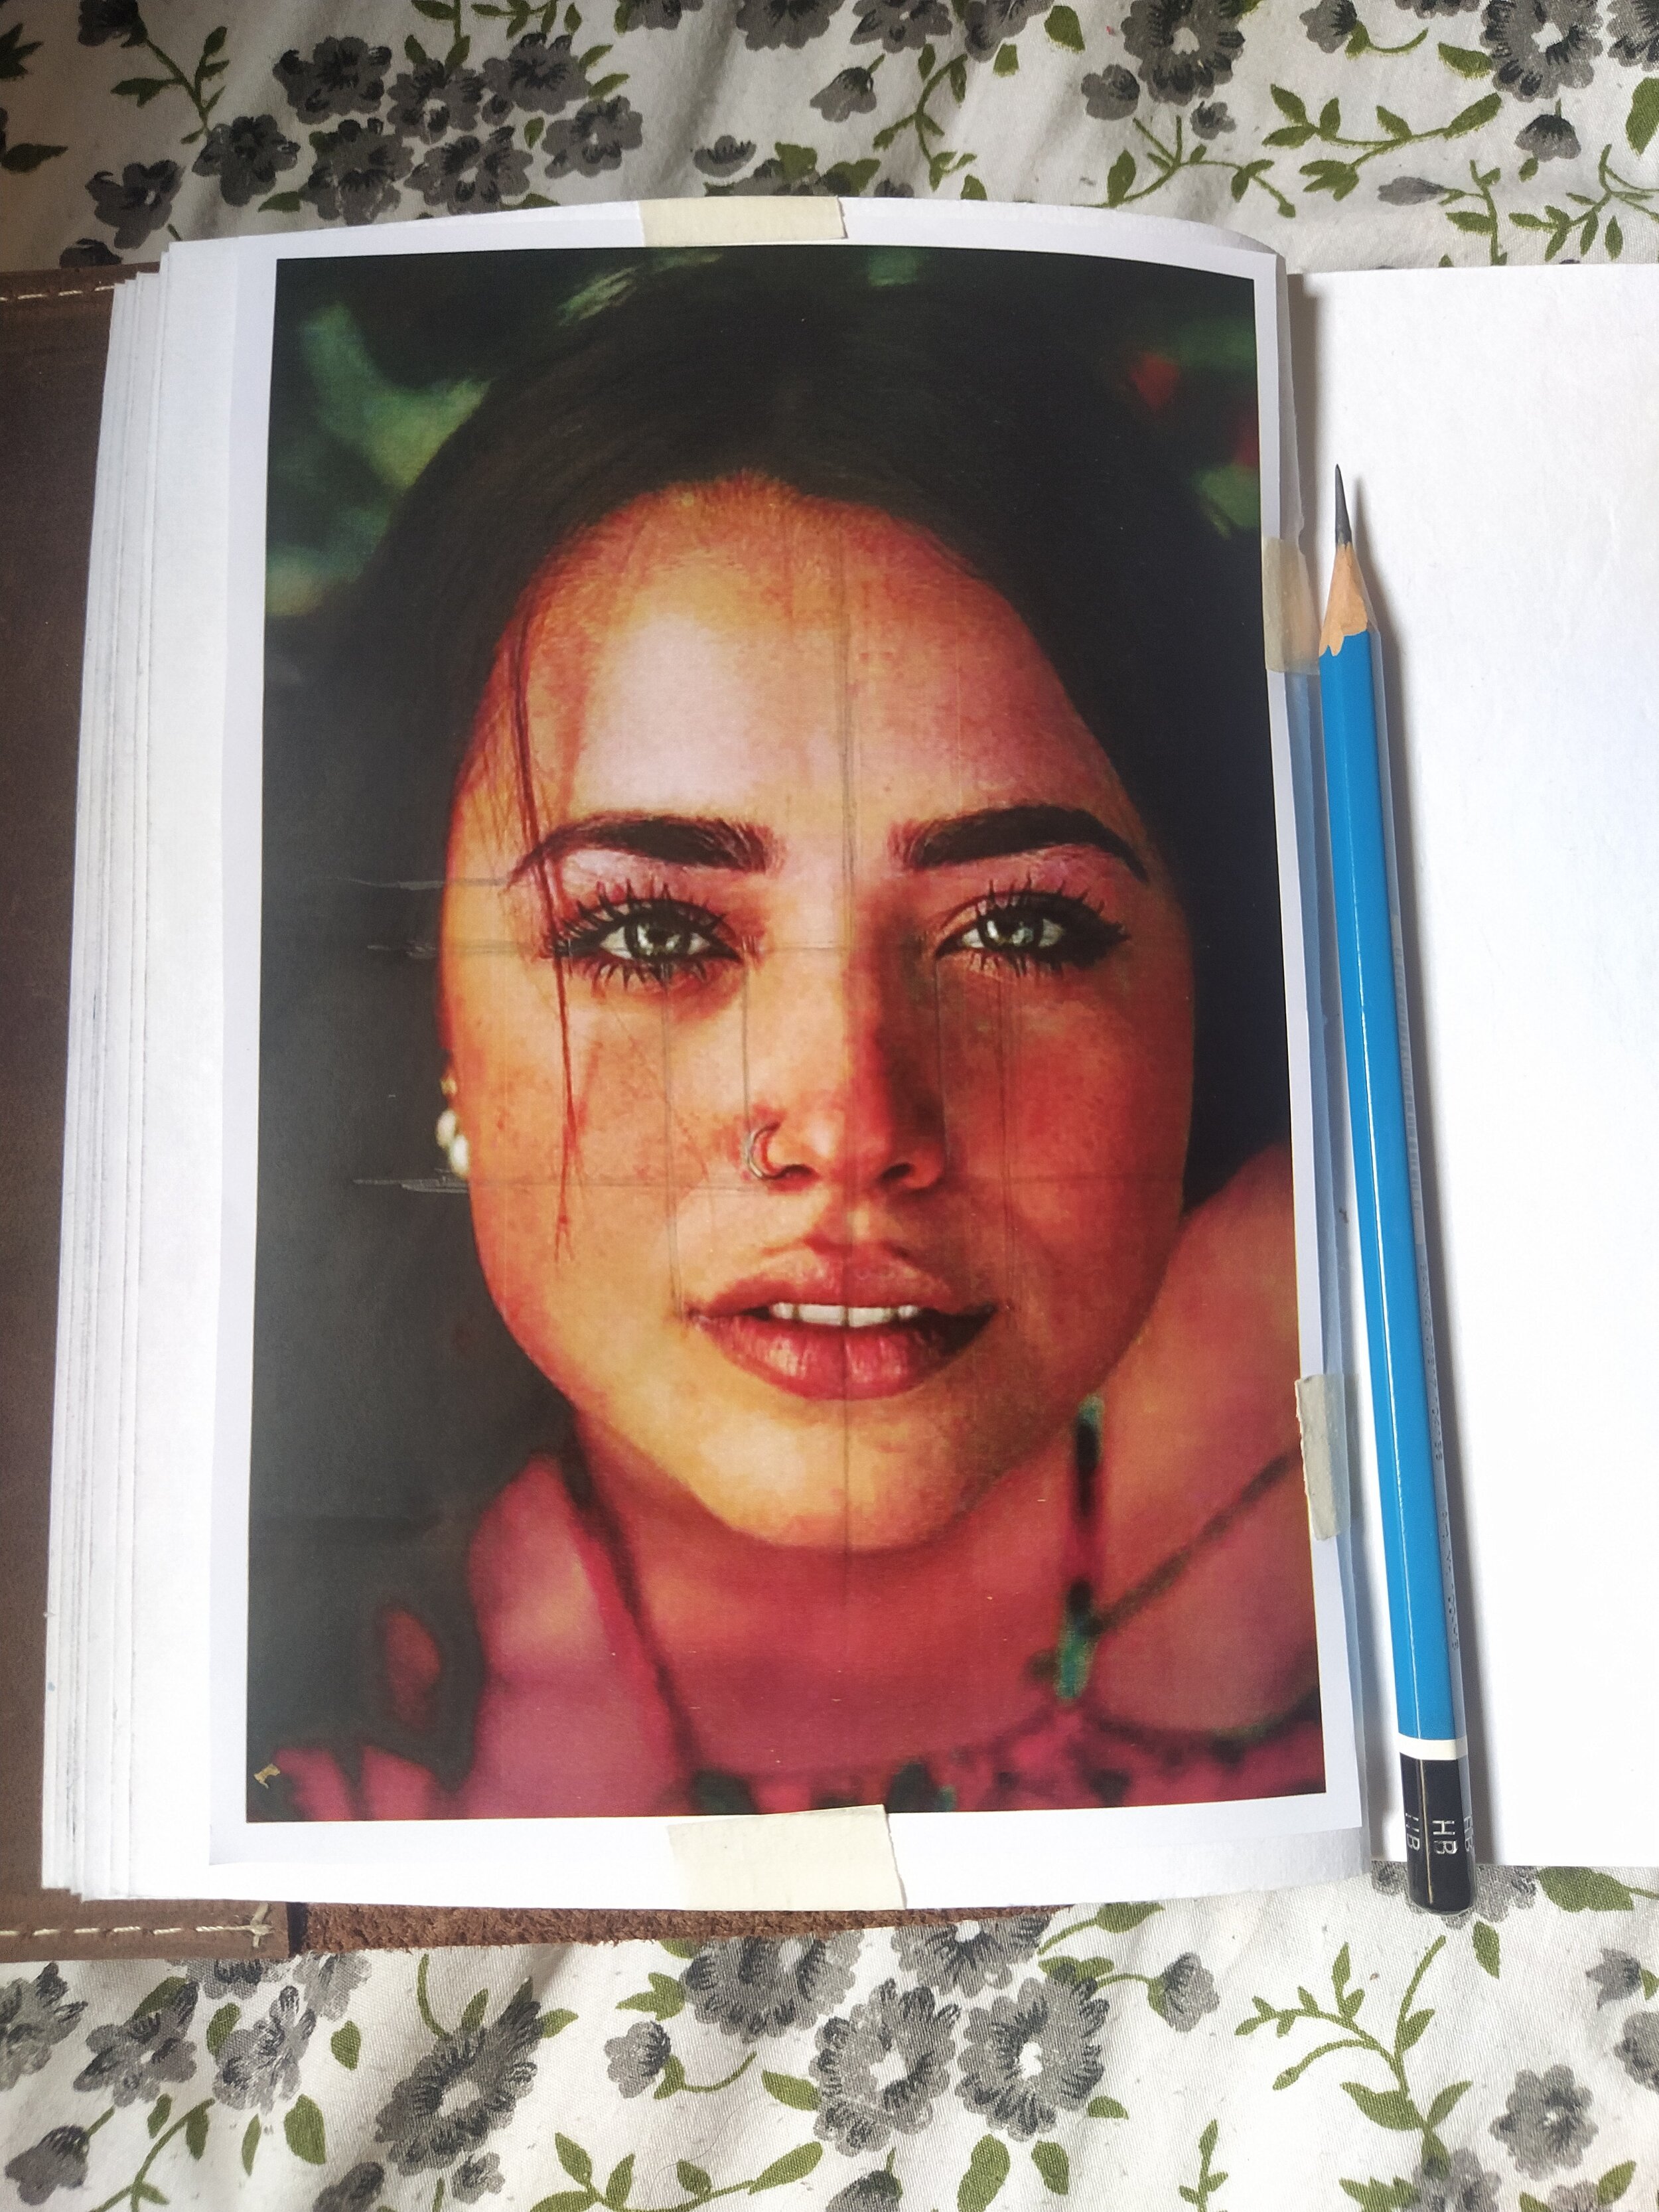
Once you know who you want to draw, start looking at all the available options in their pictures to use as reference for your sketch. We want the picture to be-
a. High Resolution: Blur pictures are a big NO. They make your job unnecessarily difficult.
b. Close-up: Capturing the likeness is difficult if the pictures are clicked from afar. They may even get blurry when zoomed in.
c. Well lit: A picture having both Highlights and Shadows helps add dimension in your sketch.
The examples below will help you understand what I mean by that

Bad Reference
In this picture the face is all one shade/value, using this picture would make the sketch look very flat.

Good Reference
In this picture there are highlights and shadows, these will add dimension to the sketch.
TIP: If you are a beginner, choose a front angle picture to simplify things.
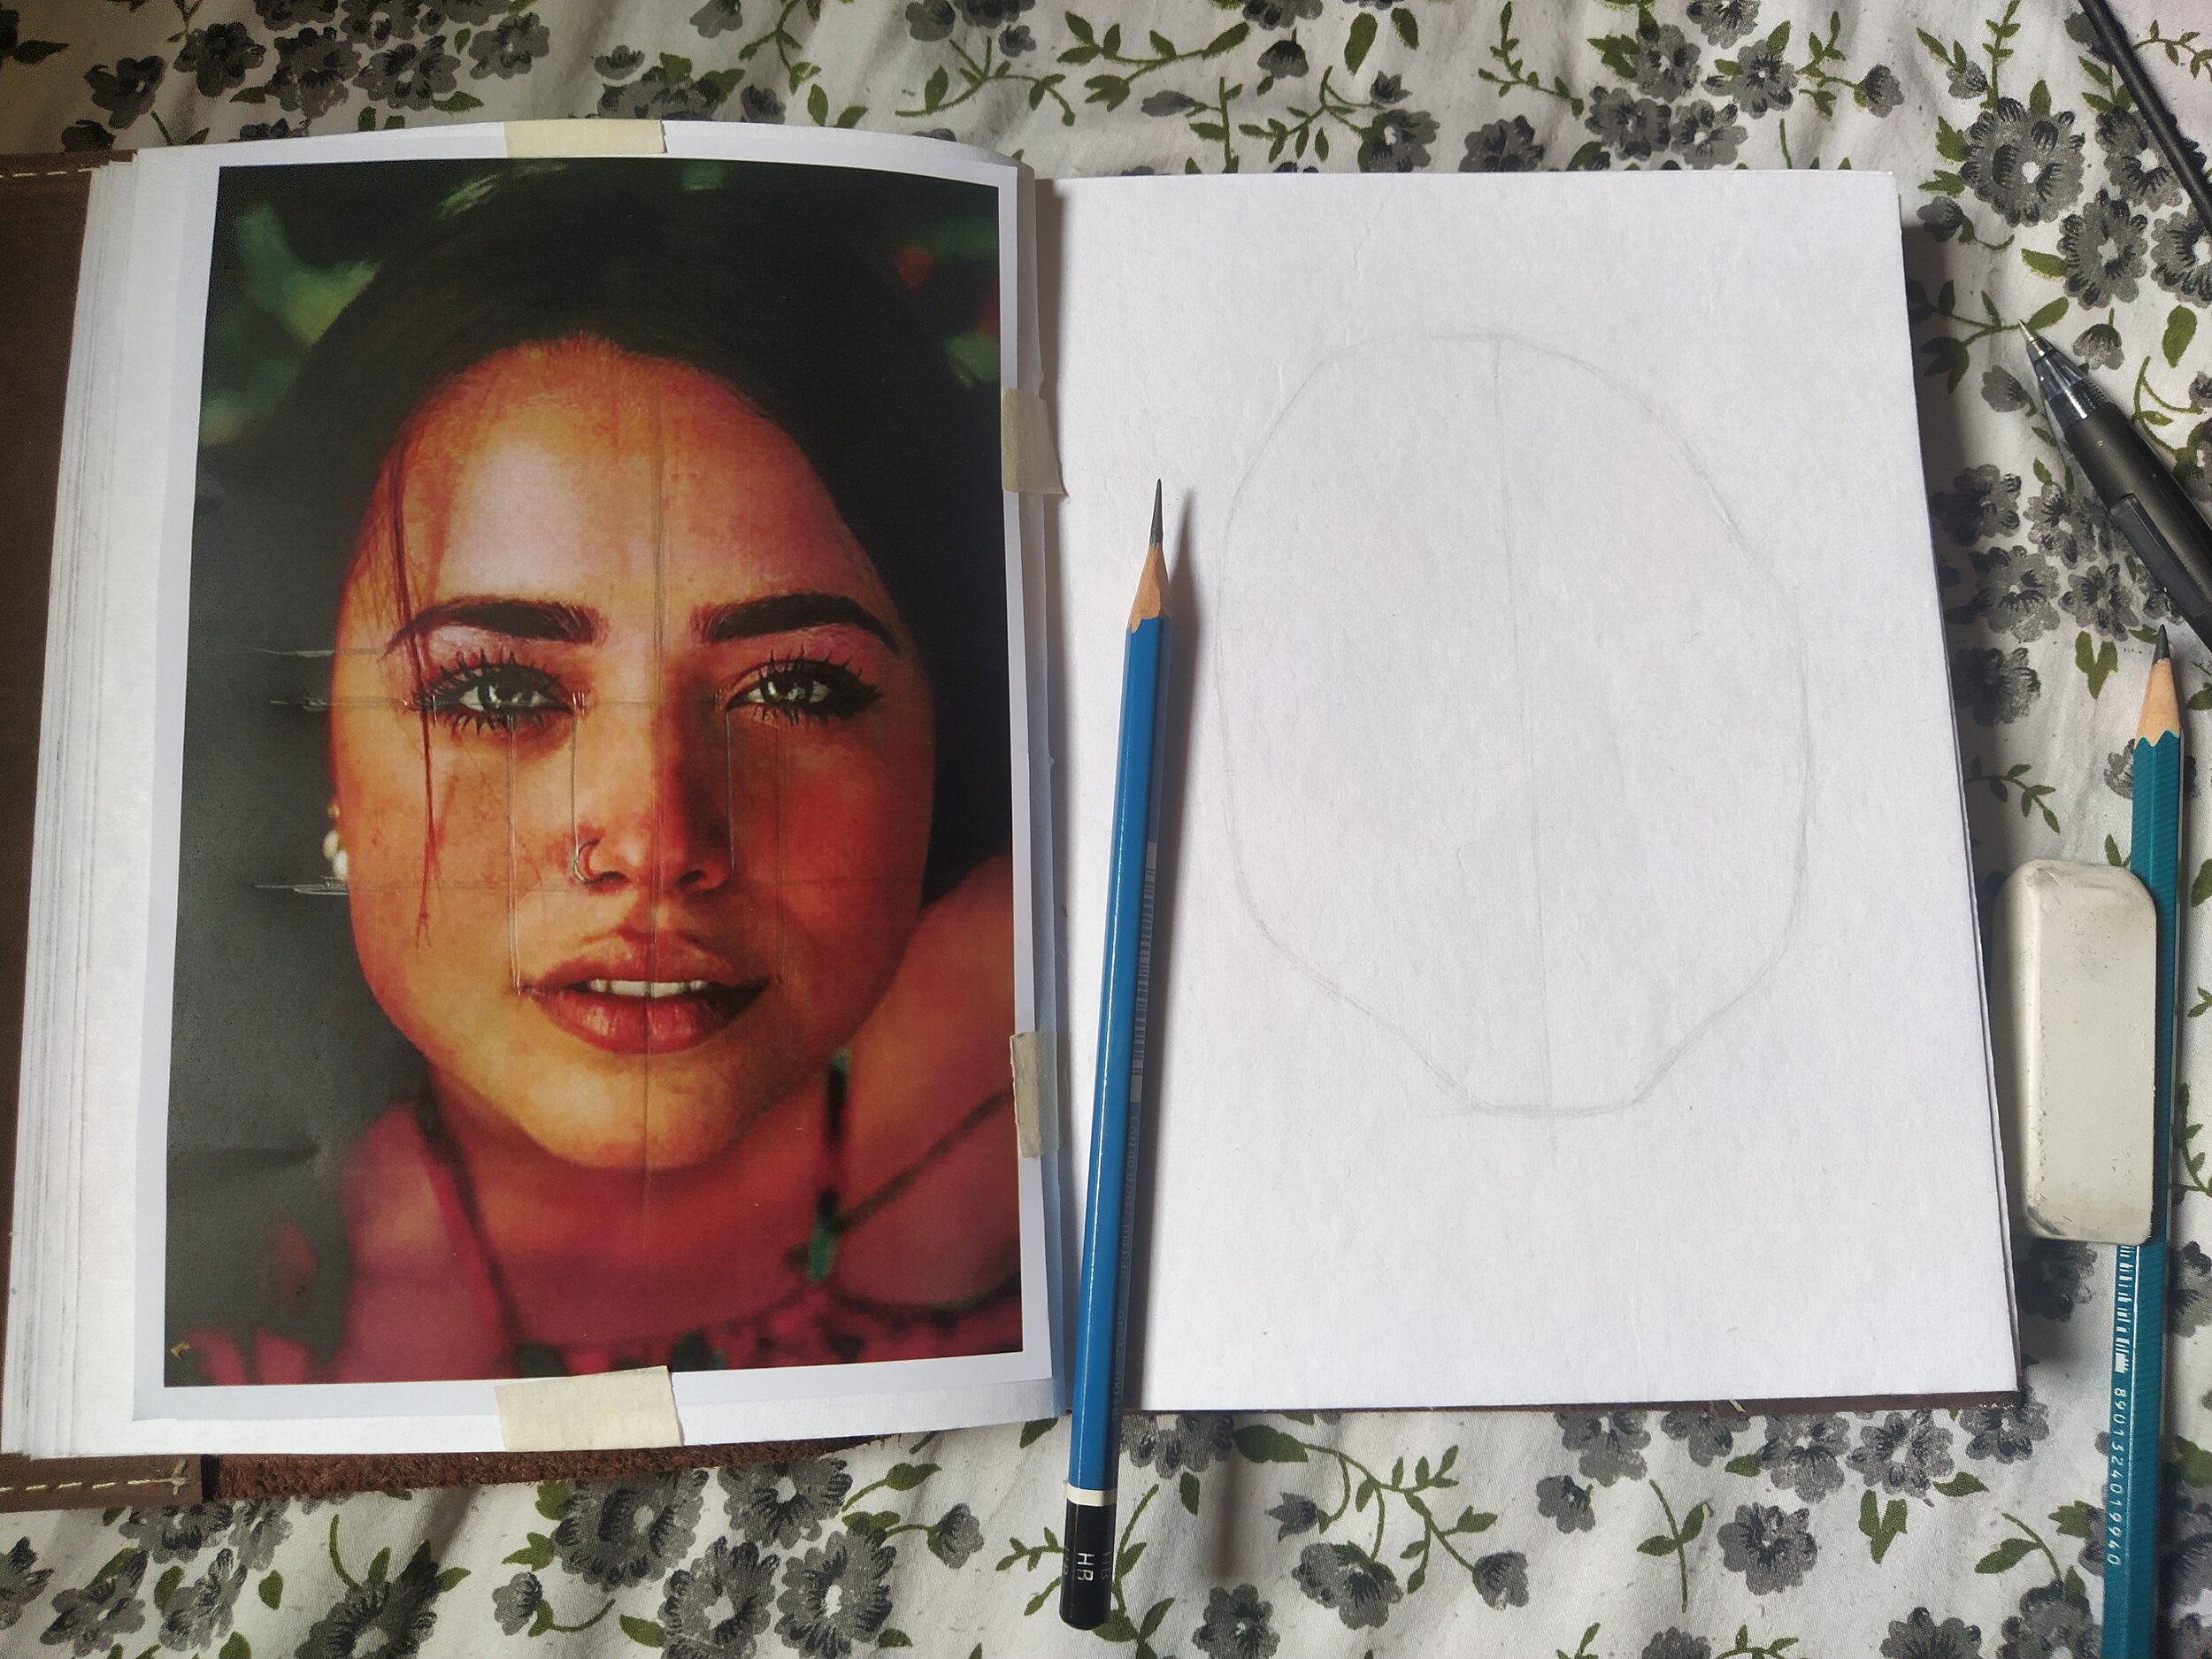
3. Print your Reference
Drawing from your phone is not ideal for beginners since every time you zoom in or out, the proportions i.e., the size of the face changes. A print out will have one constant size and will make our future steps easier.

4. Study the Reference
When drawing faces, it is good to know the standard face proportions. Most faces (not all) follow these rules.
a. Vertically
· If lines are extended from the tear ducts of both eyes, these lines will mark the width of the nose.
· If lines are extended from the centers of both eyes, these lines will mark the width of the lips.

Vertical Rules
b. Horizontally
· The distance between two eyes is generally equal to an eye.
· If line is extended from end of the nose, this line will mark the end of the ear.

Horizontal Rules
Mark all these lines on the printout so we can transfer them to our paper.
Study your Reference
5. The center Line
Transferring the information from our reference to the paper starts with the straight line that runs vertically through the middle of the face. Here on, we draw everything with an HB or H grade pencil. We will use our darker pencils when rendering the sketch.

Center line
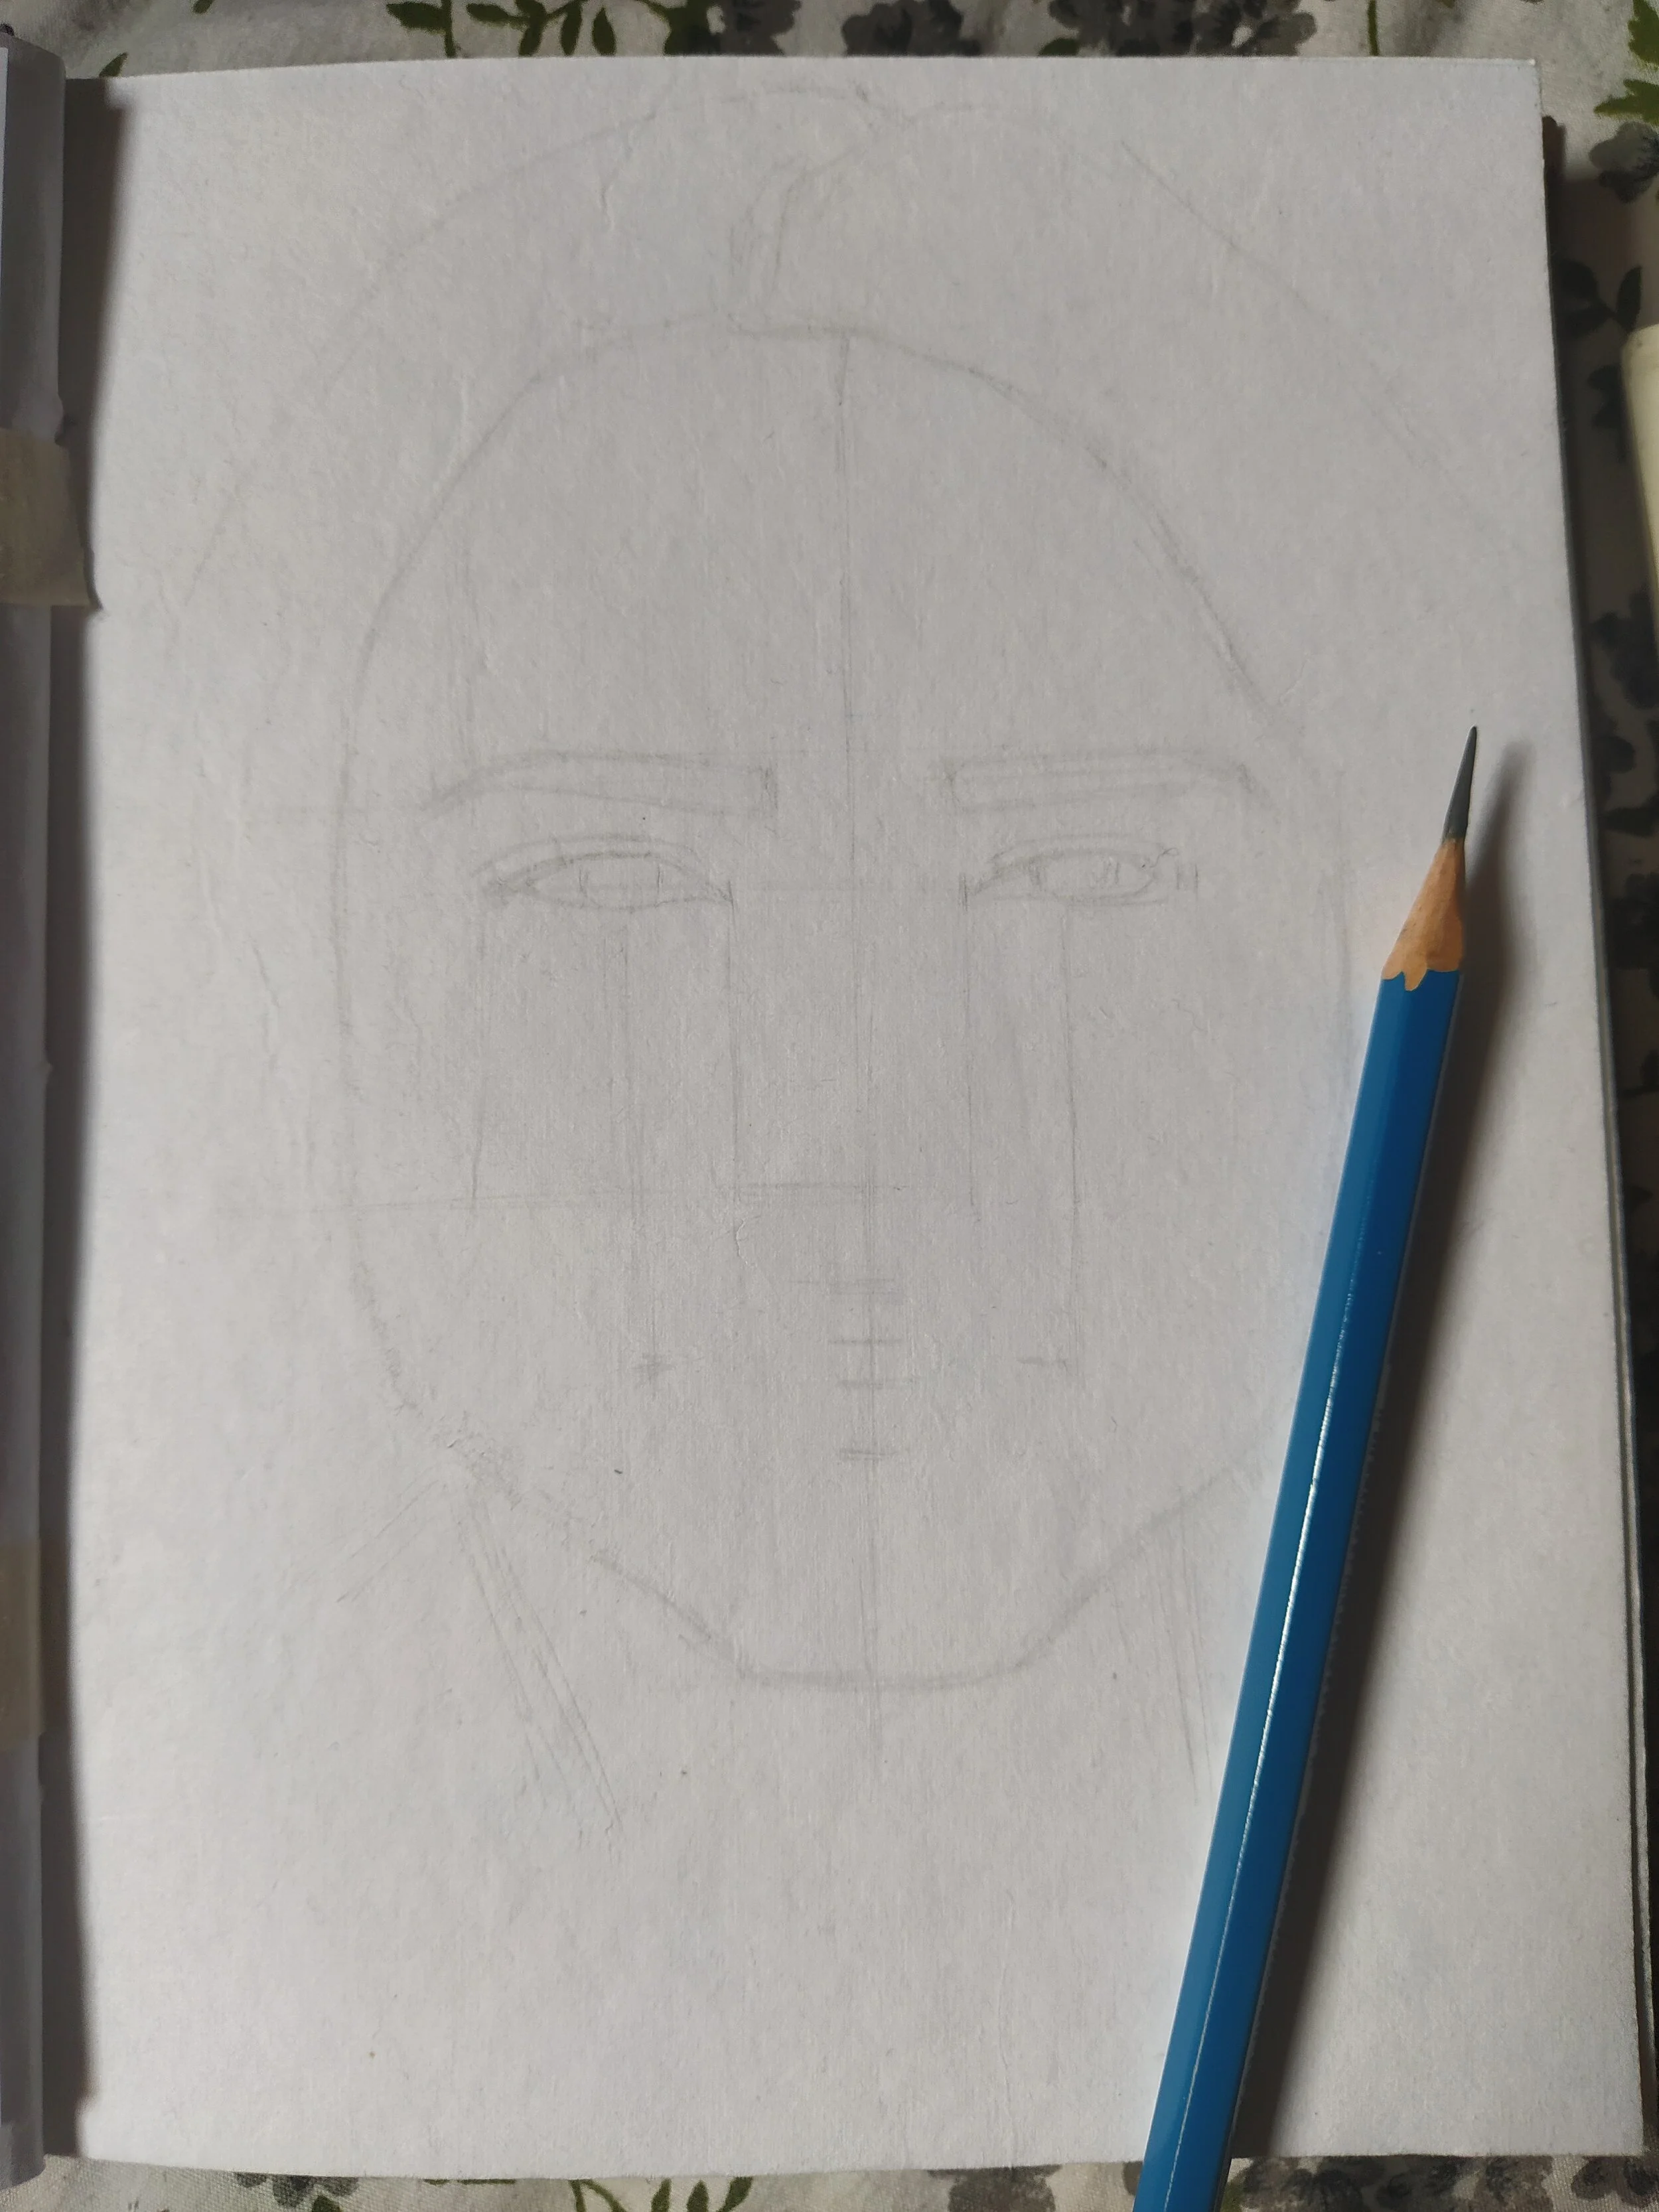
6. The shape of the face
Starting with a rough shape of the face can help keep the overall size of the face and other features in check. If this is kept for the last, you may end up drawing way too big or small face.
Shape of the face
7. Transferring the study lines
We have marked guides on our printout, now we have to replicate these proportions on our paper. Try to keep them as accurate as you can. Don’t start drawing the details right away, get the study lines blocked in first.
Observe your reference closely and mark where different parts of the face will start and end.

Study Lines
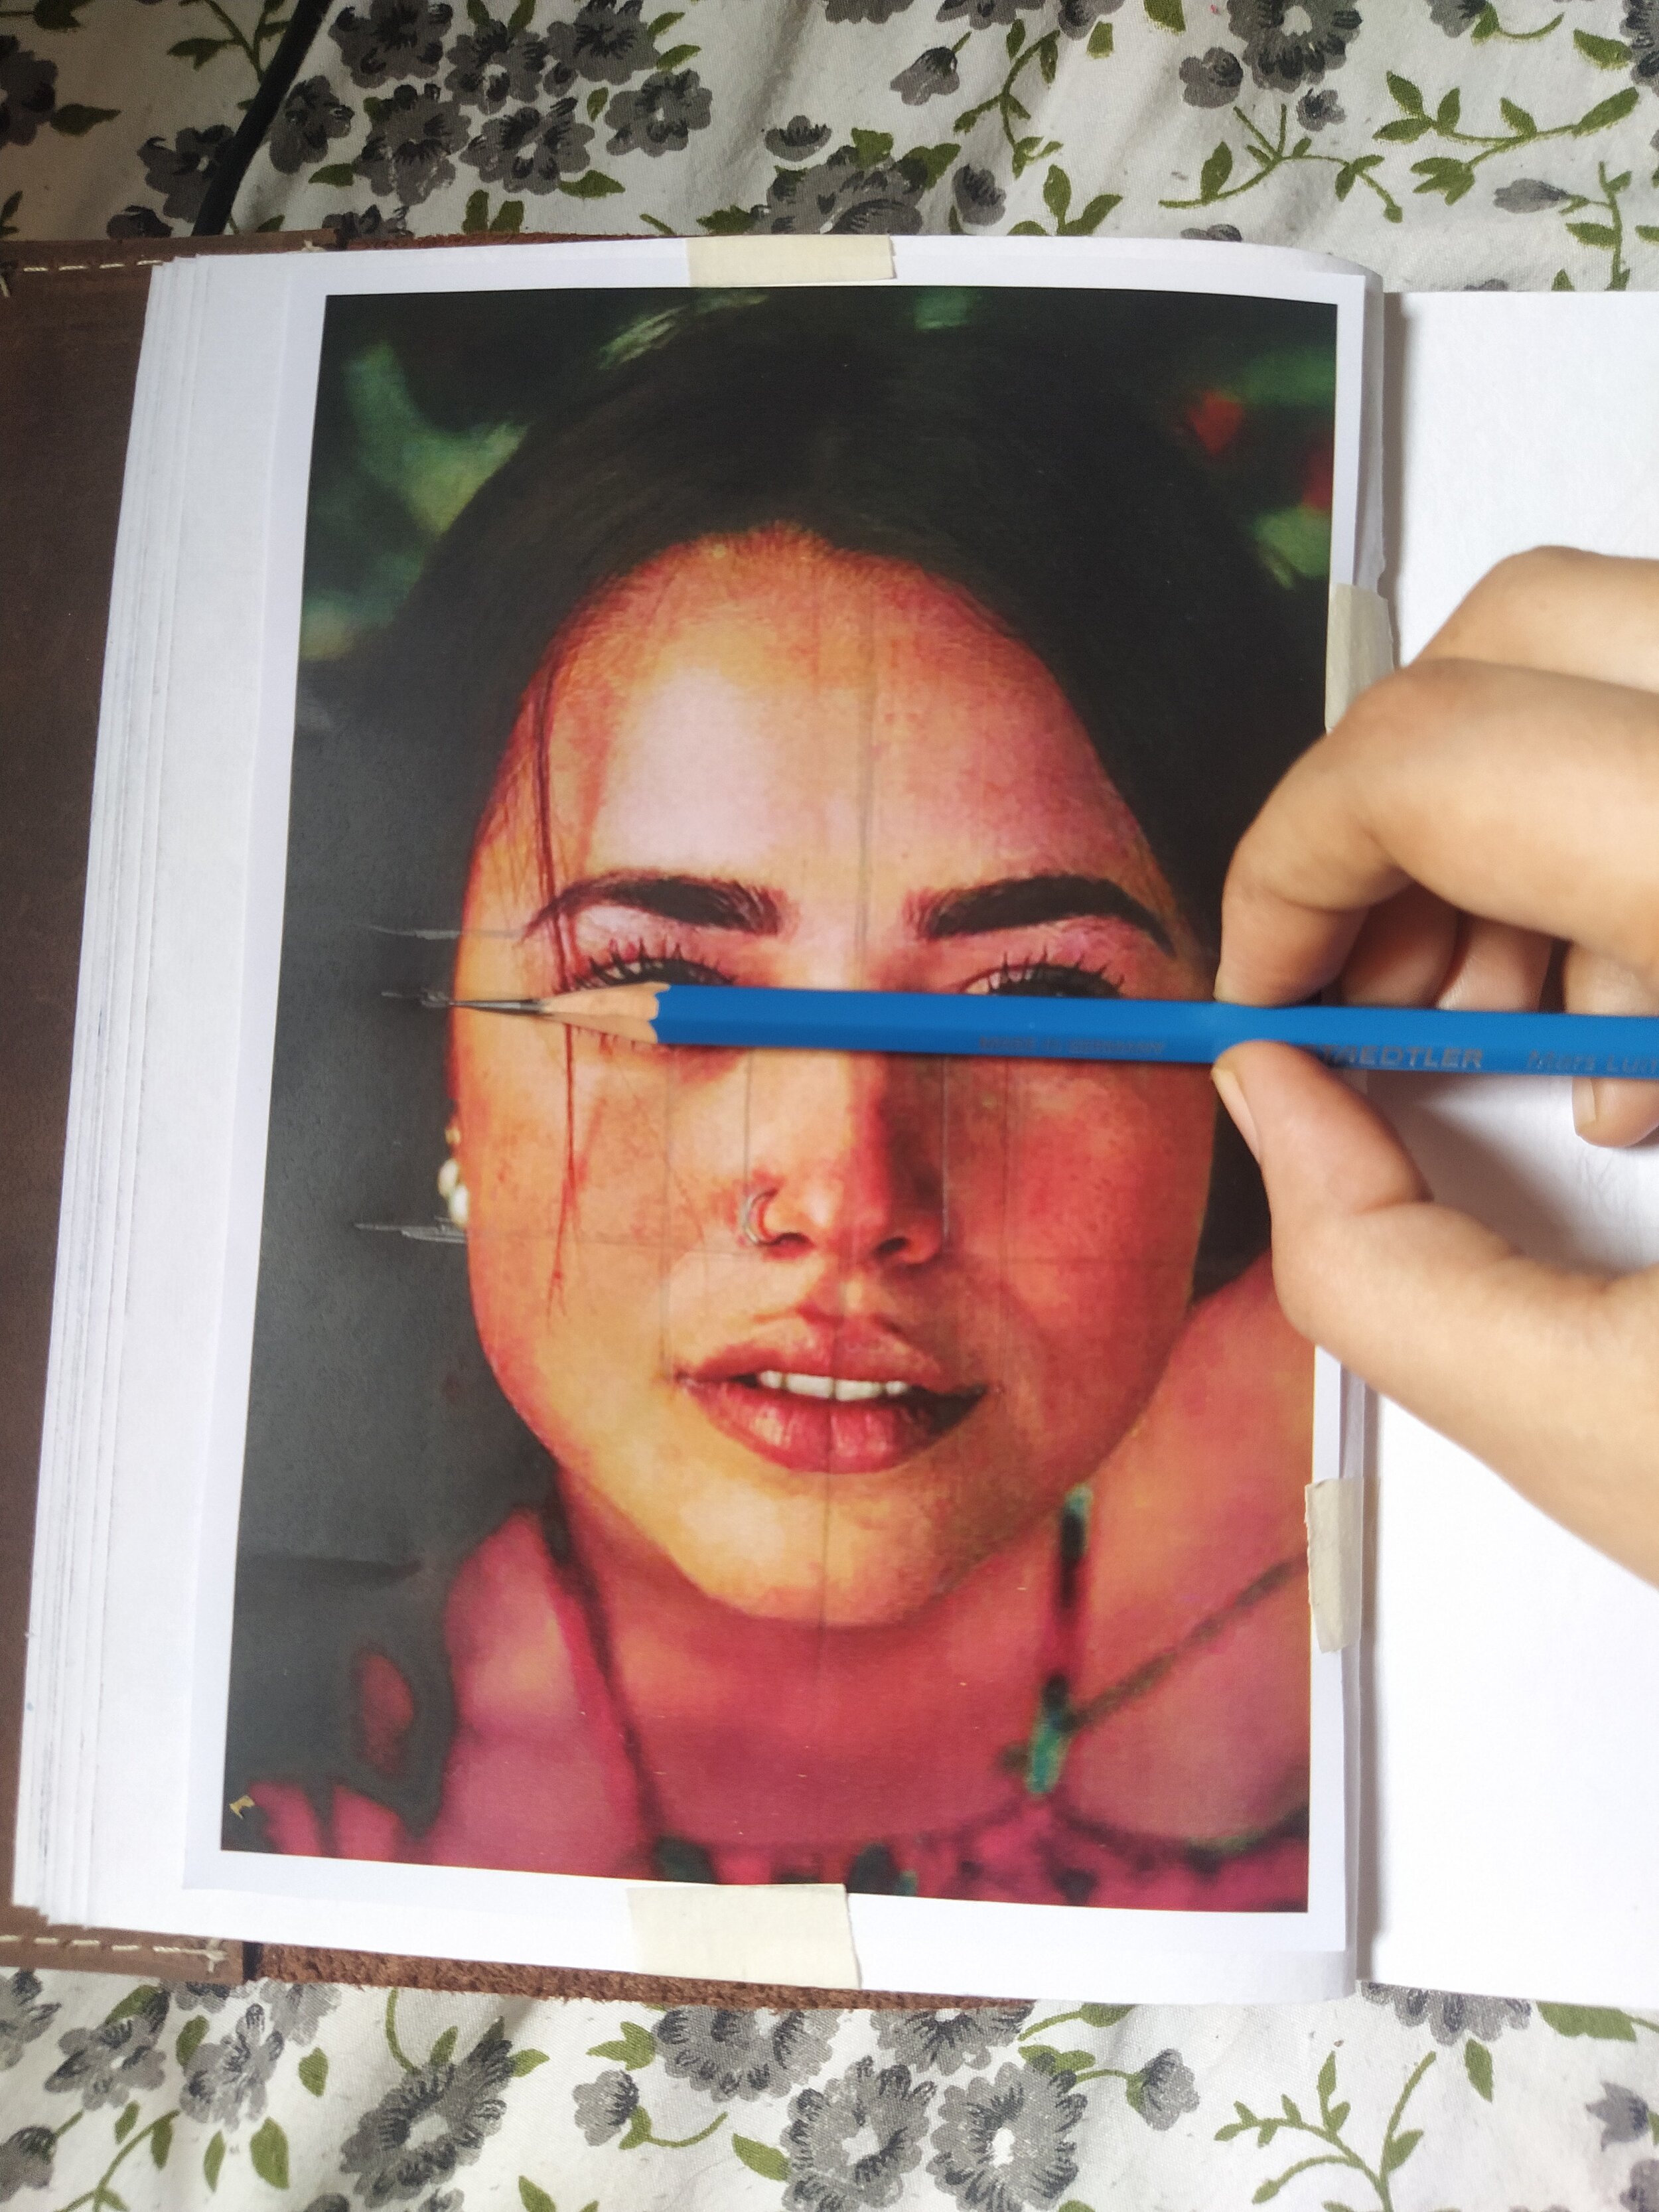
8. Improve/ Rectify (if necessary)
It can happen that some of your lines may not be very accurate, that’s okay, we only need to rectify those part before we move ahead. Measure different distances from your reference and try to match them to your sketch.
Don’t rush through it, these lines create a base for your sketch. Only when these lines are close to your reference will you be able to create the likeness of the person.
9. Draw what you see
When we start drawing the features, it is important to look back and forth between the reference and the sketch. We have a tendency to stereotype things when drawing.
E.g. Almond shaped Eyes. Upper lip arched like Cupid’s bow.
Draw what you see, not what you know. This stage has to be done patiently and respecting the guide lines we laid down before.
10. The Eyes
Eyes are the center of the drawings in portraits. They also help in calculating distances of other facial features and so, if you’re comfortable with it, you should start with them. Eyes set the tone for the rest of the sketch.
Eyes usually need to be smaller than what you think. When we look at a reference, it is easy to misread information on the size of the eyes. So, it’s always a good idea to go back in and check the proportions couple of times.
The eyes
11. The Nose
Most beginners find Nose to be a difficult area to tackle. It is the area that extends further most on the face and that depth should be communicated in the sketch as well. The technique of using sphere for the tip of the nose, makes it easier to effectively add that depth.

Nose

The Nose
12. The Lips
(Tip: Beginners should try to use pictures that don’t have the person’s teeth showing. Drawing teeth in your first attempt may be taking too big a bite. )
For Lips, always start with the partition line. This gives us enough room on the top and the bottom to add or subtract volume from/to the lips. The suggestion of a smile on the face also majorly depends on the middle (partition) line.

Lips

The Lips
13. The Ears
In the front angle pictures, Ears aren’t completely visible. The only care you need to take is to measure the length. Ears may not grab attention of the viewer but an odd sized ear won’t look pleasant either.
You need not be very specific about every single fold on the ear, just suggestions of the general shape are going to be enough.
14. Take a break
After drawing the features and before rendering (shading) it is a good idea to take a break of at least 30 minutes. In the break avoid looking at the sketch. This helps us to come back to the sketch with fresh eyes and when we do, we easily spot errors we couldn’t before.
15. Check proportions
After the break, look at the sketch and try to spot any mistakes you made. If you’re unable to do it on your own, or if you’re confused, ask a friend or a family member to look at the reference and then the sketch. They may be able to help, but keep this as your second option. First, try doing it on your own.
You can use your pencil as a measurement tool to guide you here. Check all the proportions once again before you move ahead.
Check Proportions 1

Check Proportions 2
16. Rendering
Rending helps in adding depth to the sketch, so it won’t look flat anymore. Adding dark and light values following the reference is the best part of the process. It makes the sketch come to life. Use your 2B/4B here. We aim to introduce our Darks here.
You can use either Hatching, Cross hatching, Straight lines or lay flat layers and smudge them to achieve your desired result. I personally prefer using straight lines and here’s how my process goes.


17. Fin
You get to call the shots here. You put your pencils down when you are happy with the darks and lights in your sketch.

Final Sketch